10.4 Big Feelings
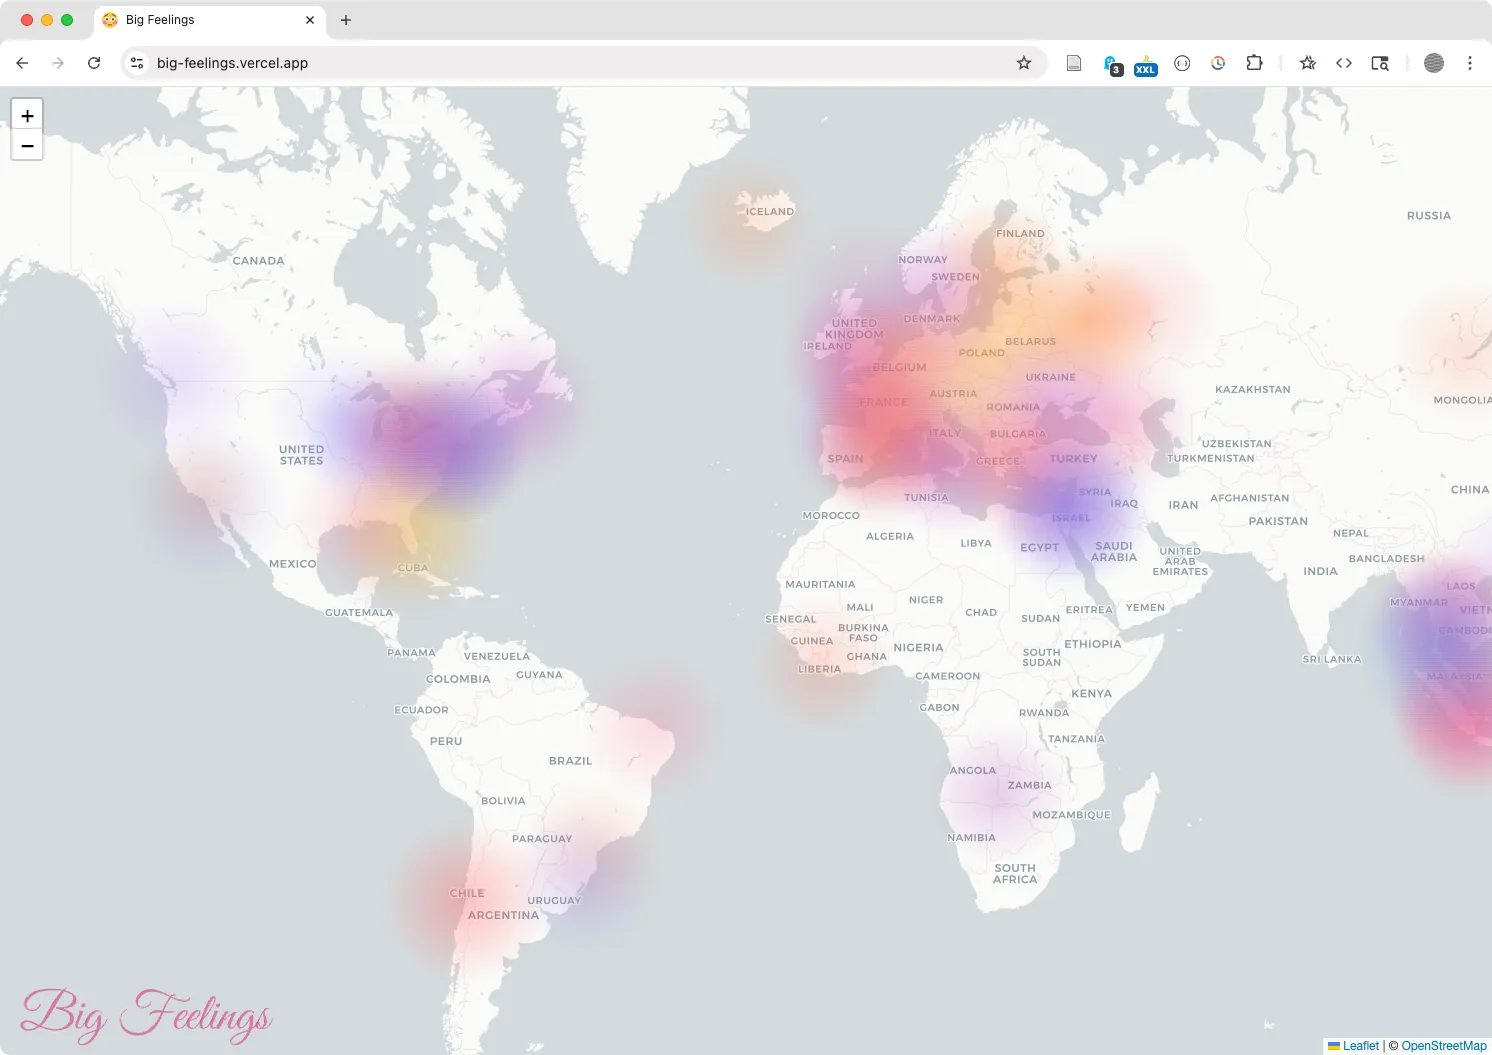 The final version of the prompt for Chapter 10 can be found online https://big-feelings.vercel.app
Project Setup
Section titled “Project Setup”- Using Codespaces (or VS Code if you are developing locally) open the
big-feelings-starterproject repository that you edited in Chapter 10. - Like the Bad Password API (BPA), we modified the project structure to make it easier to publish the front-end version on Github Pages. Move
index.htmland theassetsfolder into thepublicfolder. You’ll see the structure is similar to our Bad Password API, with aapi/index.jsandapi/routes.jsfile.
- package.json Meta information and project dependencies
Directoryapi Server files
Directorydata/ Testing data
- …
Directorydatabase/ Scripts to help connect and use the database
- mongodb.js The database script
- index.js Run the server using routes.js
- routes.js Contains the endpoints that return data
Directorypublic Static files go here
Directoryassets/
- …
- index.html Client side JS
This project has two parts. The back-end scripts inside api/ that run on the server and respond to requests for data from the front-end files index.html etc. in the browser.
- Open
api/database/mongodb.js. The database code is organized in its own file to “separate the concerns” and organize scripts by their specific tasks. This file connects to the database to let us save and retrieve data. Also notice that the database functionality (e.g. to create and insert data in the table) is exported inside an object calleddbto make it simpler to run the database queries fromapi/routes.js. - Open
package.jsonand you’ll see (like BPA) that the dependencies includeexpress, as well as new packages likemongodb. To install them run:
npm install- Start the server with
nodemon(see 9.3 Using Node.js). A message will appear in the terminal with the URL. Open this page in a browser to check that all is well.
Your app is listening at: http://localhost:3000Create a MongoDB Database
Section titled “Create a MongoDB Database”Before you can use our database module you’ll need to create a database using Atlas, a professional web service that provides access to MongoDB databases. (see the latest guidance in their MongoDB Atlas Tutorial tutorial).
- Click “Get Started” on their landing page and create an Atlas account
- At the end of the sign-up process, you will be prompted to create an organization (to organize users) and a project (to organize clusters and databases). For example, we created a project named
criticalwebdesign. - Login to the Dashboard https://cloud.mongodb.com/ and follow the steps in Deploy a Free Cluster to create a new free-tier cluster. For example, we named our cluster
big-feelings, left all the default options as they were, and clicked “Create Deployment.”
- Next you’ll be prompted to create a user to access databases in your cluster. We used the default user and password they generated. Save these somewhere safe! Note also your current IP address will be added to the list of allowed connections. This is a security feature that prevents someone at a different location from trying to guess your information.
- Now it’s time to choose a connection method. This is important because you’ll be connecting to the database from another machines and you need to give permission for Codespaces (and eventually, Vercel) to connect to Atlas. Click “Choose a connection method,” then select “Drivers” and choose Node.js. We’ve already added
mongodbto the dependencies for this project, so you just need to copy the connection string that contains your username, password, and other details to a safe place and proceed to the next section. It will look something like the following:
mongodb+srv://USER:PASS@CLUSTER.[...].mongodb.net/?appName=CLUSTERCreate an .ENV file
Section titled “Create an .ENV file”The connection string you created in the previous step contains your database credentials. Obviously you don’t want someone with bad intentions to be able to access this. So, don’t save in your front-end code. You also don’t want to commit this data to your Git repository which may allow someone to see it on Github.
While your frontend code will connect to your API, the connection string will only be accessible on the backend server, which will keep it safe from prying eyes. There are many ways to do this, but we are using the common .env “environment variables” file. You’ll save two versions of this file, one for testing on your own computer, and then another in Vercel when you publish your project.
- In your repo, rename the
.env.examplefile in the root of your project to.env.
- Paste the following template code into the file:
MONGODB_URI="YOUR_CONNECTION_STRING"NODE_ENV="test"- Replace the text
YOUR_CONNECTION_STRINGwith your own connection string. - Open your
.gitignorefile and confirm that.envis among the list of files to be ignored by Git so you do not commit this file!
Test Database Connection
Section titled “Test Database Connection”With the connection string in place you can test your database connection using our test script.
- In Atlas, make sure your current IP address is allowed to connect.
- Go to https://cloud.mongodb.com/
- Click “Clusters” on the left
- Click “Database & Network Access” on the left
- Click “IP Access List” on the left
- Click the “Add IP Address” button
- Quit the server with
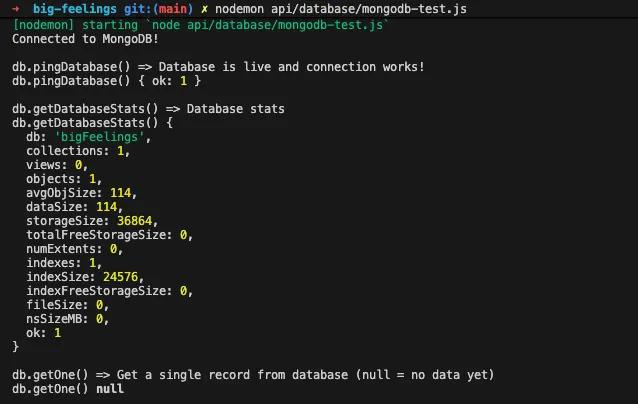
Ctl+c - Run our database test script using nodemon:
nodemon api/database/mongodb-test.js- In the Terminal confirm you can see the results of the test script, including ping, stats, etc. Every time you run this script it will add a single entry with random data.
- Verify that data was saved in your database by going to
- Go to https://cloud.mongodb.com/
- Click “Data Explorer” on the left
- Click “Connect” on your cluster in the list
- Expand your cluster and database and select the collection.
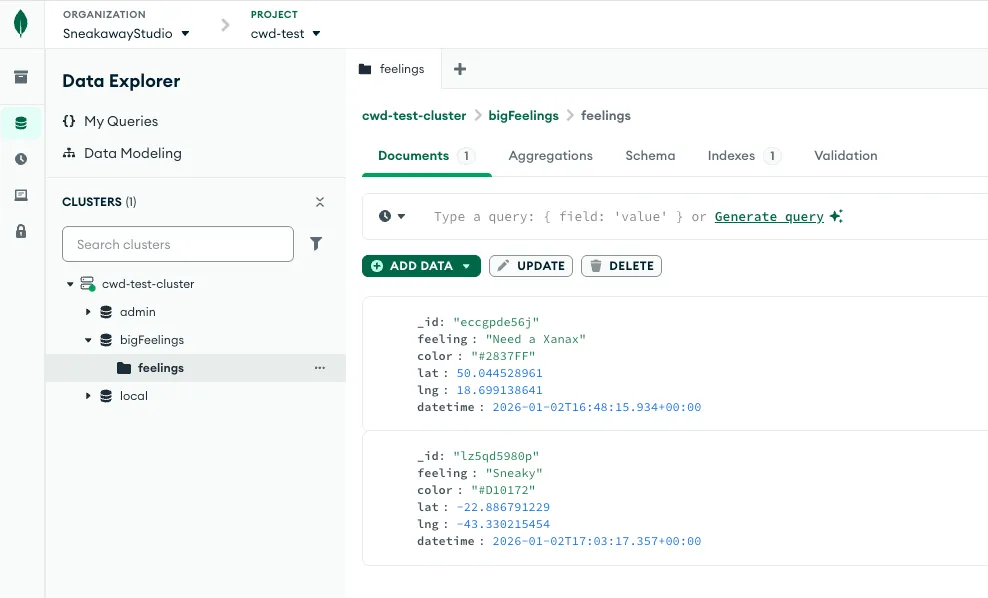 Data inside
 cwd-test-cluster (cluster) > bigFeelings (database) > feelings (collection)
Use Node.js and MongoDB
Section titled “Use Node.js and MongoDB”Now that you have confirmed you can connect from your IP address to your database, you can switch to using your own database with this project.
-
Quit the database test script with
Ctl+cand start the project withnodemon. Go to http://localhost:3000/ and you should see the map. Note it is still getting data from our finished API. -
In
api/routes.jsimport our database module
// 👉 import database reference here (Chapter 10 wiki) ...import db from "./database/mongodb.js";// 👈- Now you can add API endpoints that call the functions exported from our module. First, make sure the API is working. Test the root endpoint at http://localhost:3000/api and you should see the following:
{"message":"hello"}- Add the below function to
api/routes.js(look for our finger emojis!) to retrieve data for the map. This route will use thedb.getAll()function to query the database for all records. It usesawaitto make sure and wait for the query to finish so that it has results before sending a response. Test this route now in a new browser window by going to http://localhost:3000/api/feelings. You should see an empty array only because there is no data in the database, yet…
// 👉 add endpoint to get all the rows in the database (Chapter 10 wiki) ...router.get("/api/feelings", async function (req, res) { let result = await db.getAll(); res.json(result);});// 👈- Add this endpoint below the code you added above to
api/routes.jsto add test data to the database. This route is not meant to be public, we are enabling it temporarily to add testing data only. Each time you load this page http://localhost:3000/api/addOneTest you will insert a new entry with random information. You can use the Atlas Data Explorer or the feelings endpoint to test it http://localhost:3000/api/feelings
// 👉 add endpoint to insert test data (Chapter 10 wiki) ...router.get("/api/addOneTest", async function (req, res) { let result = await db.addOneTest(); res.send({ message: result });});// 👈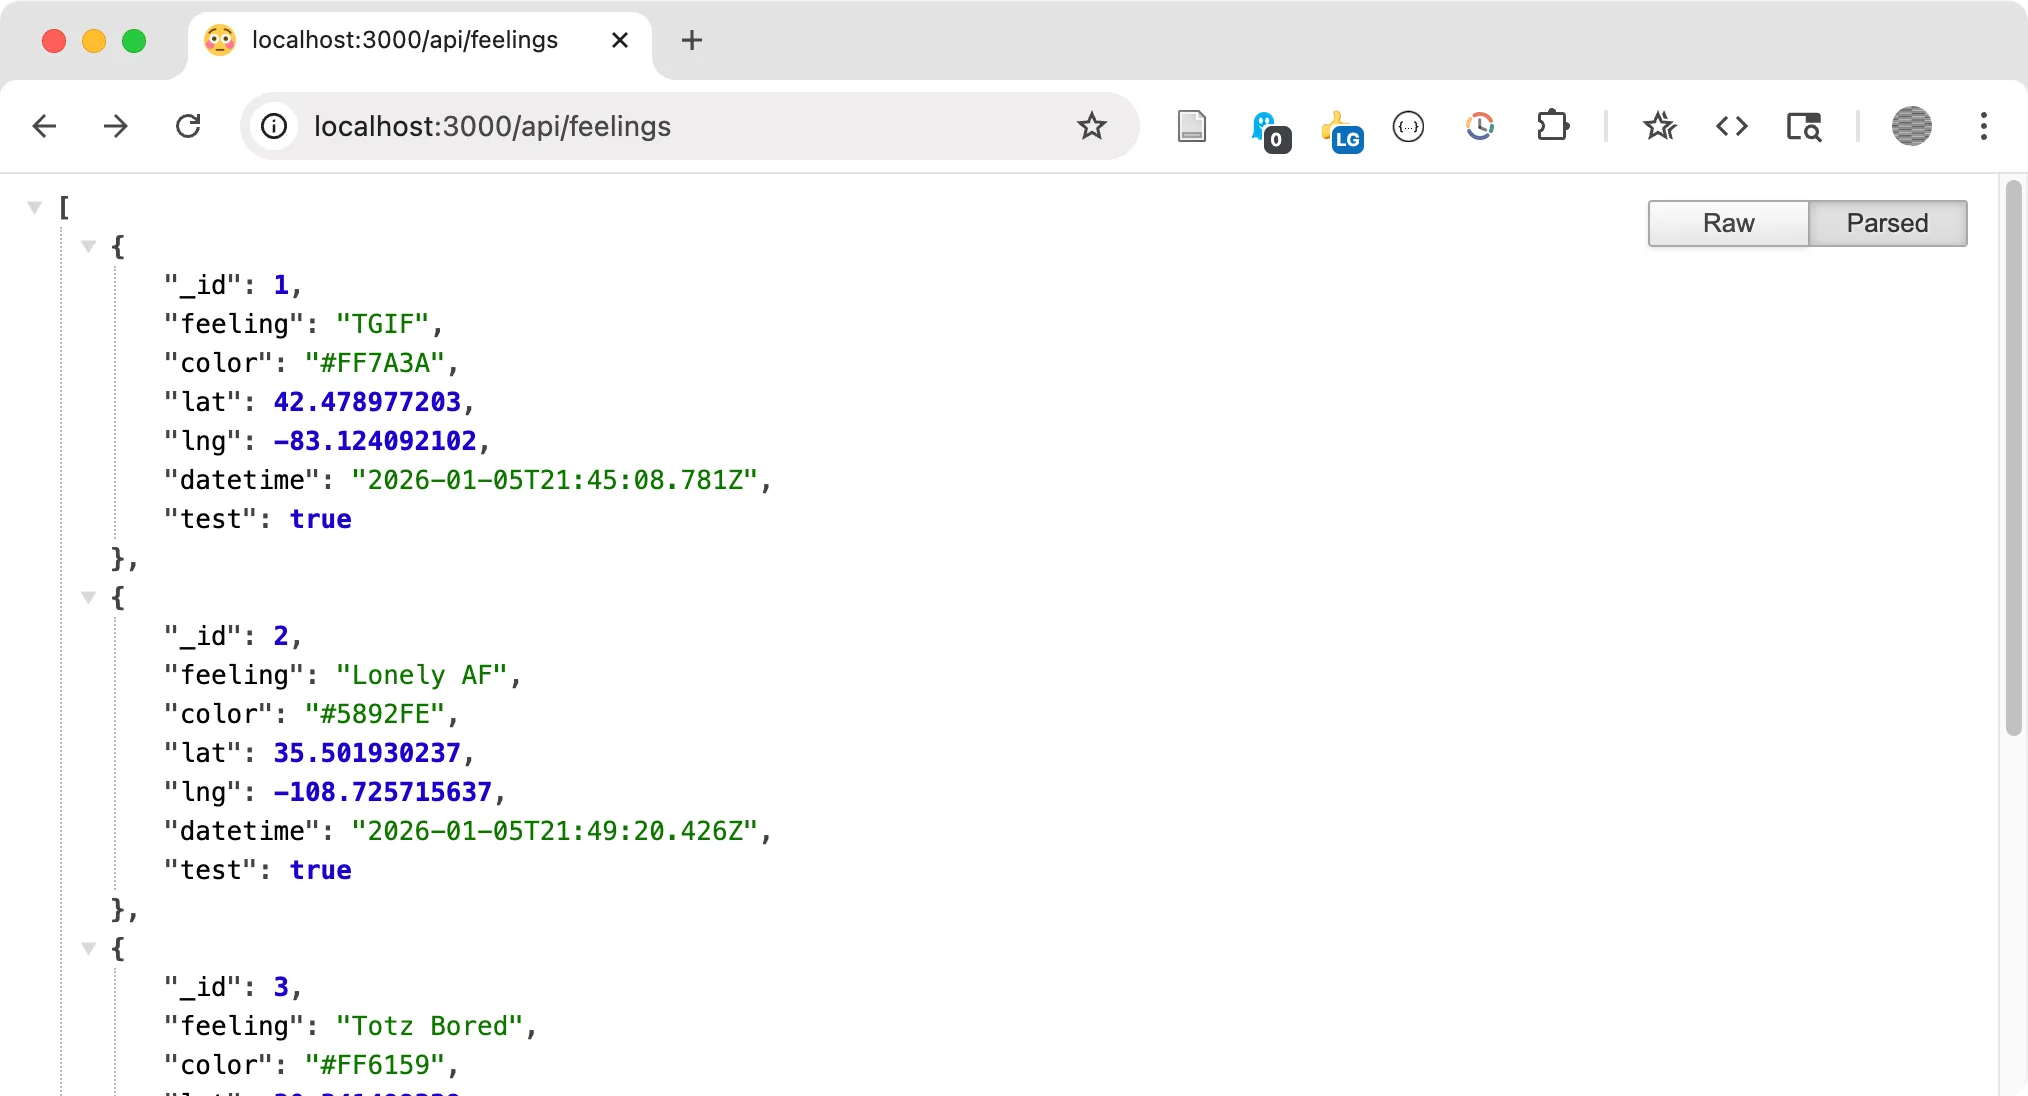 Data from mongodb at the feelings endpoint
- Now that you have feelings in the database you can change your frontend to point to your own backend API. Add this line to change the URL under the original
baseurldeclaration inpublic/assets/js/main.jsand visit your site to see your data on the map http://localhost:3000
// 👉 add new base url to pull from your own database (Chapter 10 wiki) ...baseurl = "";// 👈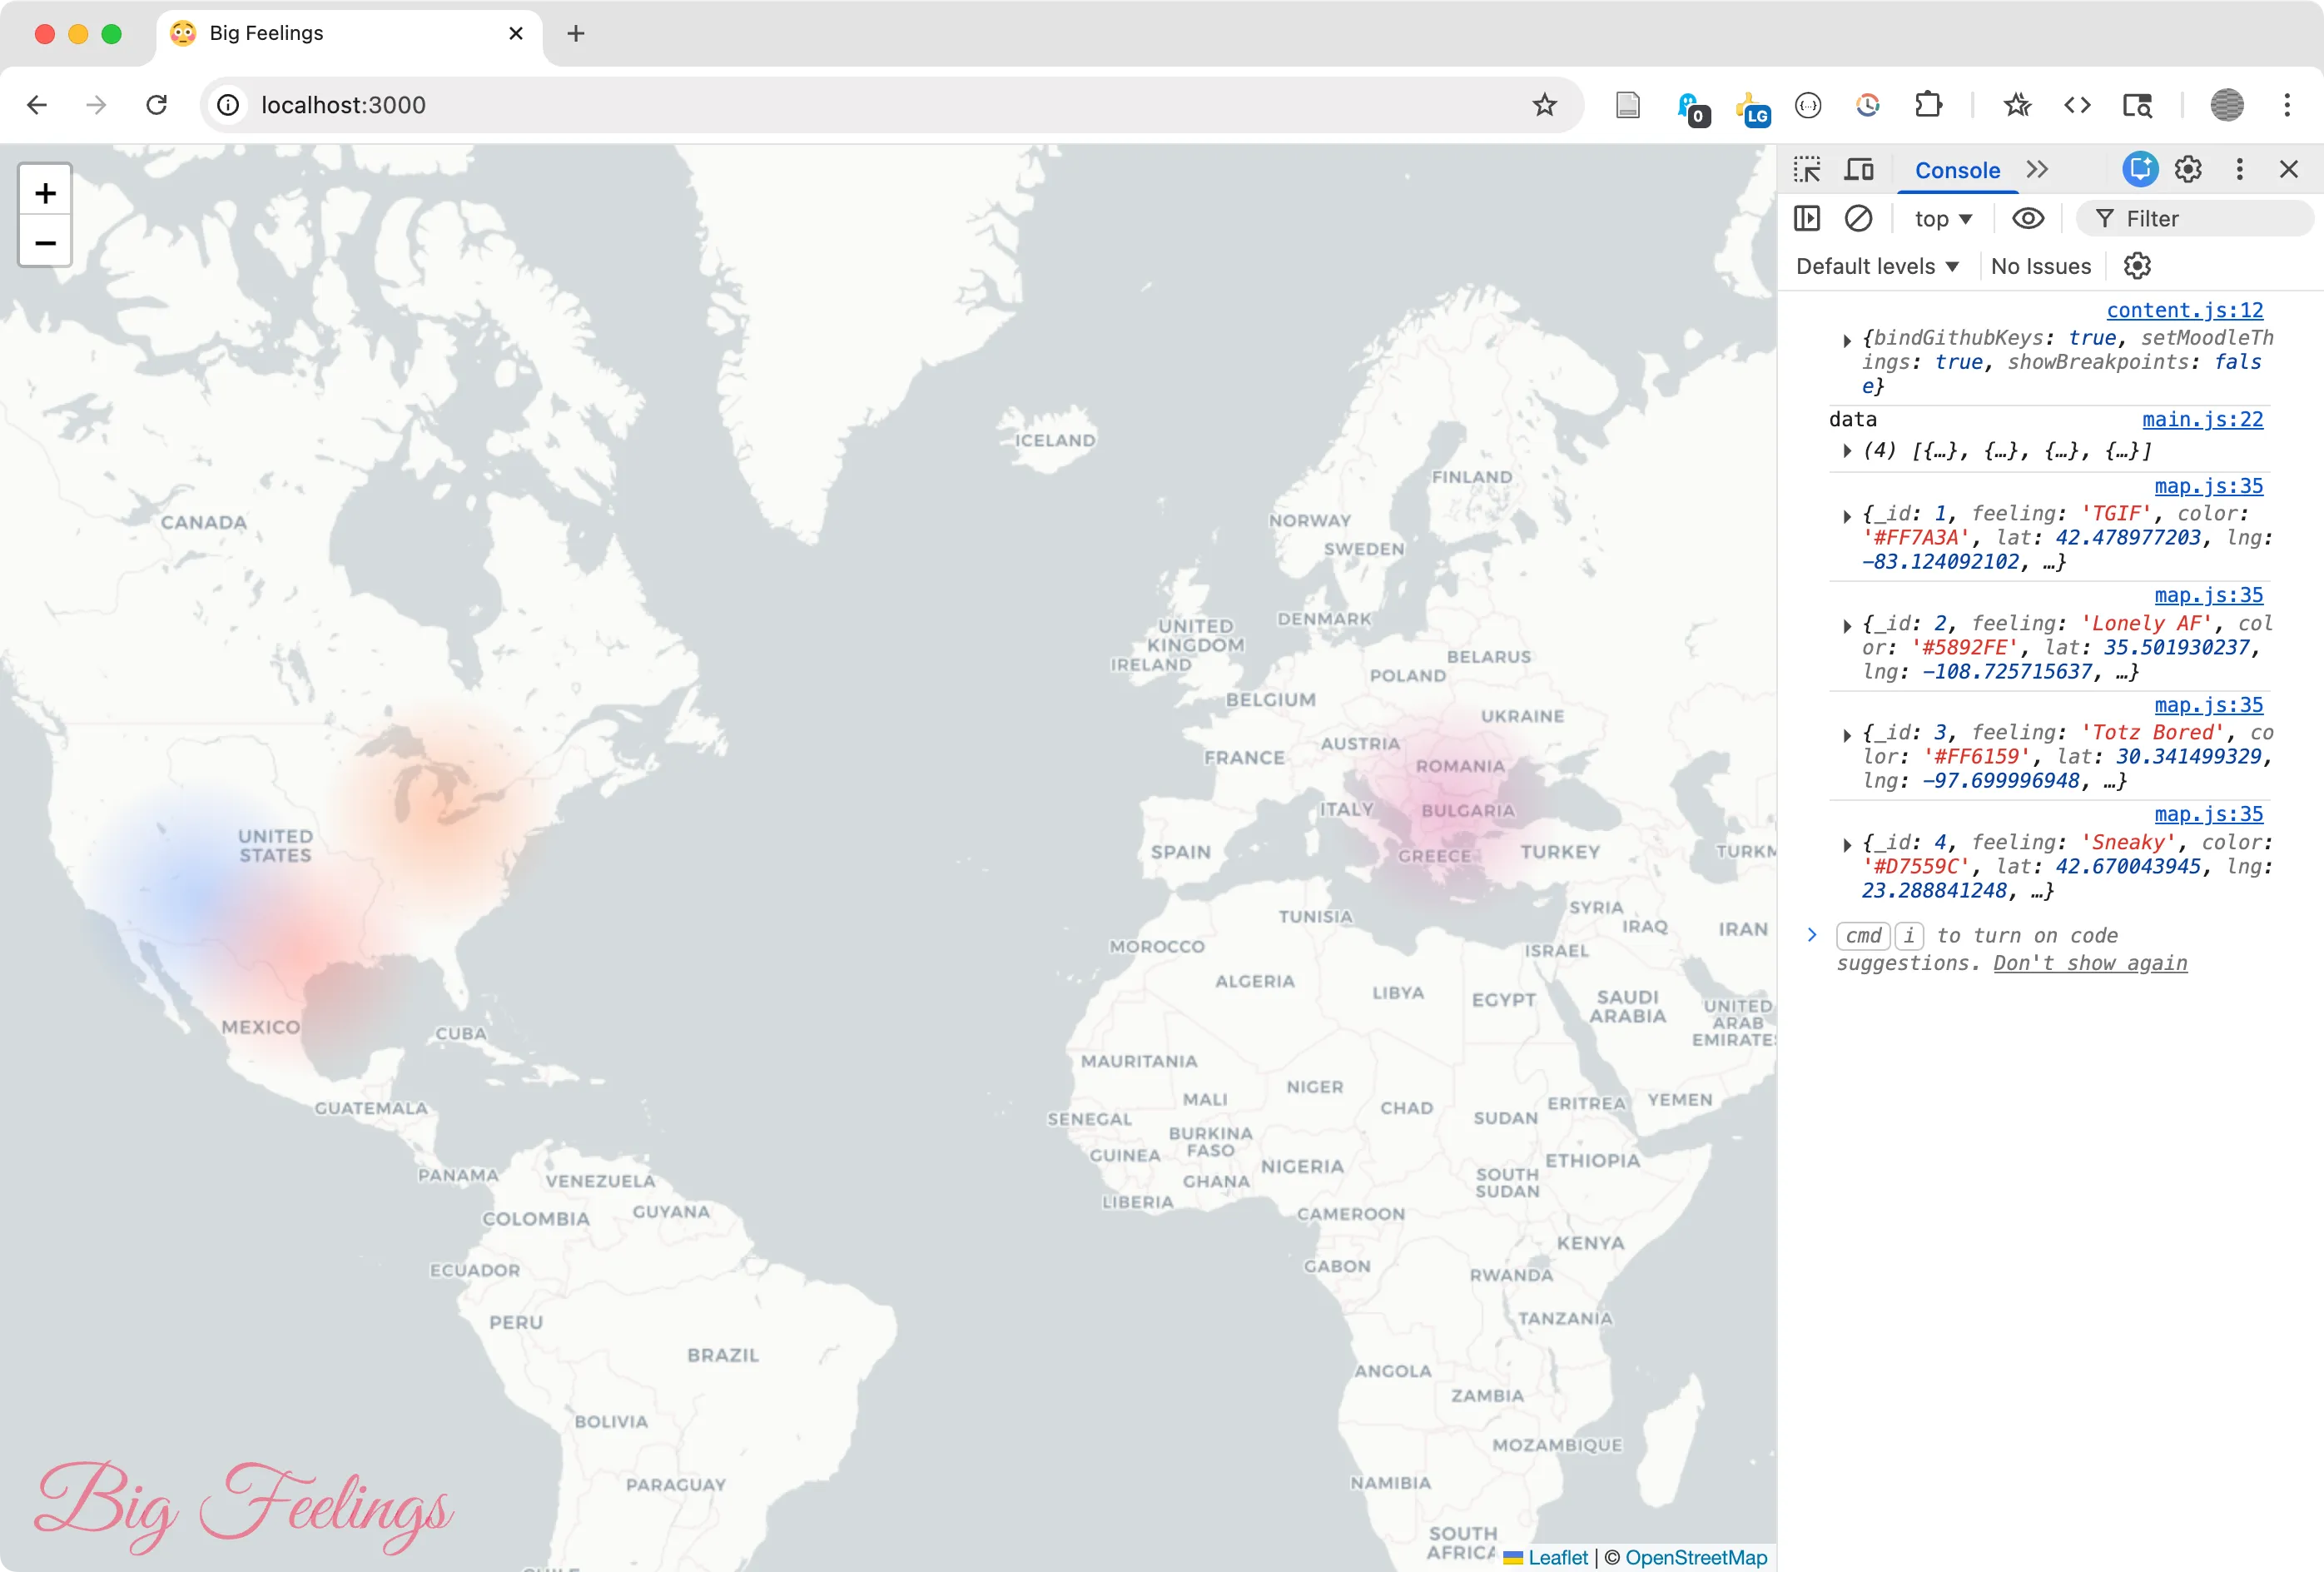 Markers appear on the map for each feeling. Always keep your console open in case you have errors!
Allowing Visitors to Submit Feelings
Section titled “Allowing Visitors to Submit Feelings”You may notice the Leaflet popup that appears if you click on the map, though nothing happens in your project if you click submit. With the form wired up, we can now connect the web form to let users submit new data.
- In
public/assets/js/main.jsfind thesubmitForm()function. This is called when a user clicks submit. Add the following code to store the form data into a variable calleddataand log it. If you reload your page and test your form you will see a JS object of form inputs in the console.
function submitForm(e) { // 👉 add code inside this function (Chapter 10 wiki) ... e.preventDefault(); let data = getFormData(); console.log(data); // 👈}- We’ve already added a
/api/feelingPOST endpoint that receives the request from the form and updates the database. Look insideapi/routes.jsand you will notice it usesrouter.post()instead ofrouter.get(). - This means your
fetch()function on the front end needs to send this data using aPOSTrequest. Add the following to the bottom ofsubmitForm()to create a newoptionsobject you can use withfetch()that sets the method toPOST, adds a special header to inform the server it is sending JSON data, and stores the data from the form in body of the request. TheJSON.stringify()function converts a data object to the text equivalent (a.k.a. “serialization”) so it can be sent over the internet.
function submitForm(e) { // step 1 - get form data e.preventDefault(); let data = getFormData(); console.log(data); // step 2 - create options object to send data let options = { method: "POST", headers: { "Content-Type": "application/json", }, body: JSON.stringify(data), };}- Now add the
fetch()code below to send the data to the server. The route will return an updated JSON object, which you can use to callupdateMap(json)and thencallshowSuccessMsg()to let the user know everything worked. You can test your project now, watching the console and make sure everything works.
function submitForm(e) {    // step 1 - get form data    e.preventDefault();    let data = getFormData();    console.log(data);
    // step 2 - create options object to send data    let options = {        method: "POST",        headers: {            "Content-Type": "application/json",        },        body: JSON.stringify(data),    };
    // step 3 - use fetch to send data    fetch(baseurl + "/api/feeling", options)        .then((response) => response.json())        .then(async (json) => {            await updateMap(json);            showSuccessMsg("Your feeling was added");        });}
Publish on Vercel
Section titled “Publish on Vercel”1. Project Setup
Section titled “1. Project Setup”Follow the process we described in Module 9.4 Publish a Website with Vercel to publish your website on Vercel.
2. Add Environment Variable
Section titled “2. Add Environment Variable”Add the MONGODB_URI environment variable in your Vercel account.
- Log in to your Vercel dashboard and select your project.
- Click on the Settings tab and select Environment Variables.
- Add the variable:
- Environments: Choose “All Environments”
- Name: Enter the key
MONGODB_URI. - Value: Paste your MongoDB connection string from MongoDB Atlas.
- Click the Save button.
- To ensure the new variable is applied, you must redeploy your project.
3. Enable IP Address
Section titled “3. Enable IP Address”This step is required to allow your API on Vercel to connect to your Atlast cluster.
- In Atlas go to the Database & Network Access page for your project.
- Navigate to the IP Access List tab.
- Click Add IP Address.
- Select Allow Access from Anywhere or manually enter 0.0.0.0/0.
- Republish your project!
4. Publish Your Project
Section titled “4. Publish Your Project”Make it live using
vercel --prod